Sunday, June 30, 2019

PSK part 1: The Tin

OK, part one coming right up. First things first, what kind of container to use for your kit? Lots of options out there. Sizes vary from "altoid tin" sized kits, pill bottle kits, kits that fit in big pouches. Endless variety.  I wanted to do a mess tin kit. I really want to design this kit to perform as many roles in a survival situation as possible.  With a good sized mess tin as the container for my kit, I can use the tin to boil water when needed. Now, this does make the kit pretty big. All told I still hope to be able to fit the tin into a BDU cargo pocket for another Bush Class elective I'll be working on later.  More info on that to come, but it's going to be fun.

So the tin I chose for this is the Esee Mess Tin:


It measures 6.25" x 4" x 2.5" and weighs 6 oz. empty. It can hold 32 oz. of water, which was an important consideration for me, as  stated earlier. The main container has a folding wire handle that hinges over to hold the lid on. It does NOT latch it tightly, the lid is a little loose on the container.  I purchased this online for $15.99 shipped from 5col, a good, reliable retailer of survival and bushcraft kits and components.

When receiving the tin I did throw in a few components just for fun. I'm not set on what will stay in there yet so I'm not going to get into the contents just yet. But, we have the start of the PSK tin project.  My goal for the blog now is to gather several types of components that fall in to a few categories and test them to see what will definitely go in the kit. Categories like: Shelter, Water, Fire, signalling, navigation, food, etc...

That's it for now,

See you outside!

-J

Sunday, June 23, 2019

PSK thoughts

PSK (Personal Survival Kits) are a huge topic in the outdoors community. 

There are, literally, as many variants as there are people who have one. Thus the "Personal" right there in the name. Your needs are different than mine. Each individual's skill set, training, and experiences are going to be huge factors in their PSK contents.

For me, I look at a PSK as a last ditch situation. I've lost my pack and gear, I'm not near my vehicle and all I have to work with is what I have in that kit. It's not a kit I will live out of long term (hopefully) just long enough to self rescue, or be found by others. I'm building a new PSK as I write this article, I'll take you along with me on my thought process and we'll see where this goes.

But you don't have to build your own.  You can pick up reasonably priced kits that are chock full of great items that will be really useful to you in a survival situation.  I have a link in my side bar to a company called Best Glide that sells kits and components. An internet search will turn up many other reputable retailers as well.

If you do pick up one of these kits, consider getting two of them. One to keep for an actual survival situation. Yep, just put it aside until you're going on your adventure and you want to have it with you. The other one? Tear that thing open and play with all the parts!  You can have all the cool tools in the world but if you don't know how to use them, they don't mean anything. Use your components, learn how they work, what they do AND what they can't do. This simple exercise will help you build your own skill set and confidence. Remember that a BIG part of survival or getting out of any tough spot is mental.


That's all for now but there will be more to come in this series.


Monday, June 11, 2018

More Bushclass!

Yesterday lit a fire under me. I completed one more requirement for the Basic course of Bushclass. This one was honestly pretty easy for me. I had all the materials close at hand in various kits and nooks around the lodge. This lesson was to light 5 man made tinders using a ferro rod. Here are the photos.


.


Not sure why that photo is rotated... Anyway, the tinders shown are Jute twine, a Wetfire cube, soem dryer lint, a piece of Tinderquick, and the big white blob is a Petroleum Jelly Cottonball (PJC).


I managed to get them all lit with the ferro rod. Some were way harder than I thought they would be. I found that I needed to scrape shaving from the Wetfire cube to get it to light, some of the other tinders were already out when I got it going. It did, however burn the biggest and longest, all that flame on the upper right of the phot is from the cube. The jute twine and dryer lint took the spark well but burned quickly. The Tinderquick burned so fast it may already be out in the photo. The PJC did as well as it always does, a good burn with plenty of time to get what you needed lit.

For me, I'll keep packing Wetfire cubes in all my packs and kits because they really are good at fire starting. They take a flame from a lighter or a match super easy but if you are using a ferro rod you WILL need too scrape it up a bit. Also the PJCs will also stay in all my kits. They last forever, pack very small and have uses other than as a tinder.

Thanks again!


J

Sunday, June 10, 2018

Bushcraft USA Bushclass!

Evening folks,

The weather here Up North is great right now. Perfect time to get out and enjoy all MN has to offer this time of year.  To have a little purpose in my adventures I am finally going to settle down and COMPLETE my Bushclass Basic course from the Bushcraft USA forums. I've been a memeber there since 2012 and have attempted to start the basic class several times but found excuses to not complete it. This year I aim to knock it out, and as a way of accountability, I'm going to post my progress here in the blog.

For those who may not know, Bushcraft USA is a great forum (link in my sidebar) for anyone interested in Bushcraft, survival, homesteading, preparedness, camping..and anything else of this sort.

Some of my favorite parts of the forum are the pictures, the sharing of skills, and just hearing what it's like to be outdoors in other parts of the country. By that I mean how each geographic area is different, and how they are the same.

Bushclass is an online, at your own pace, course on, well, bushcraft! Skills and techniques to take with you to the field to help make your stay easier.  The course is the brain child of Terry Barney. Terry is a former Air Force Survival Instructor and all around font of knowledge in all things outdoors. I'd say he's probably the best skills instructor that the mainstream hasn't heard of.

Anyway, Terry put together a course of skills that anyone can take FOR FREE. There are three levels of the course: Basic, Intermediate, and Advanced. Each course has a set of requirements, some electives to choose from and, the best part, outings you have to perform in order to complete each level.  You photograph or take video of your progress and post it to the appropriate page in the forum to receive your credit for completion.

I'm working on my Basic level, I've already knocked out 2 of the requirements I will post photos of below. Here are the requirements for this level:

• Shavings and feather sticks
• 5 man-made tinders
• Twig fire
• 4 basic knots
• Basic tarp shelter
• ID 5 trees and list 2 uses for each
• Make bannock by fire
• 2 strand twist of man-made cordage
• 3 strand braid of man- made cordage
• Knife sharpening
• Make an improvised cooking implement
• Make a pot hook
• Make a simple snare
• Do 5 elective lessons

The "Final Exam" for this level is to go on 5 outings, one of which has to be an overnighter. Again, photos and/ or videos of your outings to show what you know.

I've completed 2 of the requirements for the Basic level so far.

The snare
And 4 basic knots

The figure 8 on a bight

The Sheetbend

Tautline Hitch

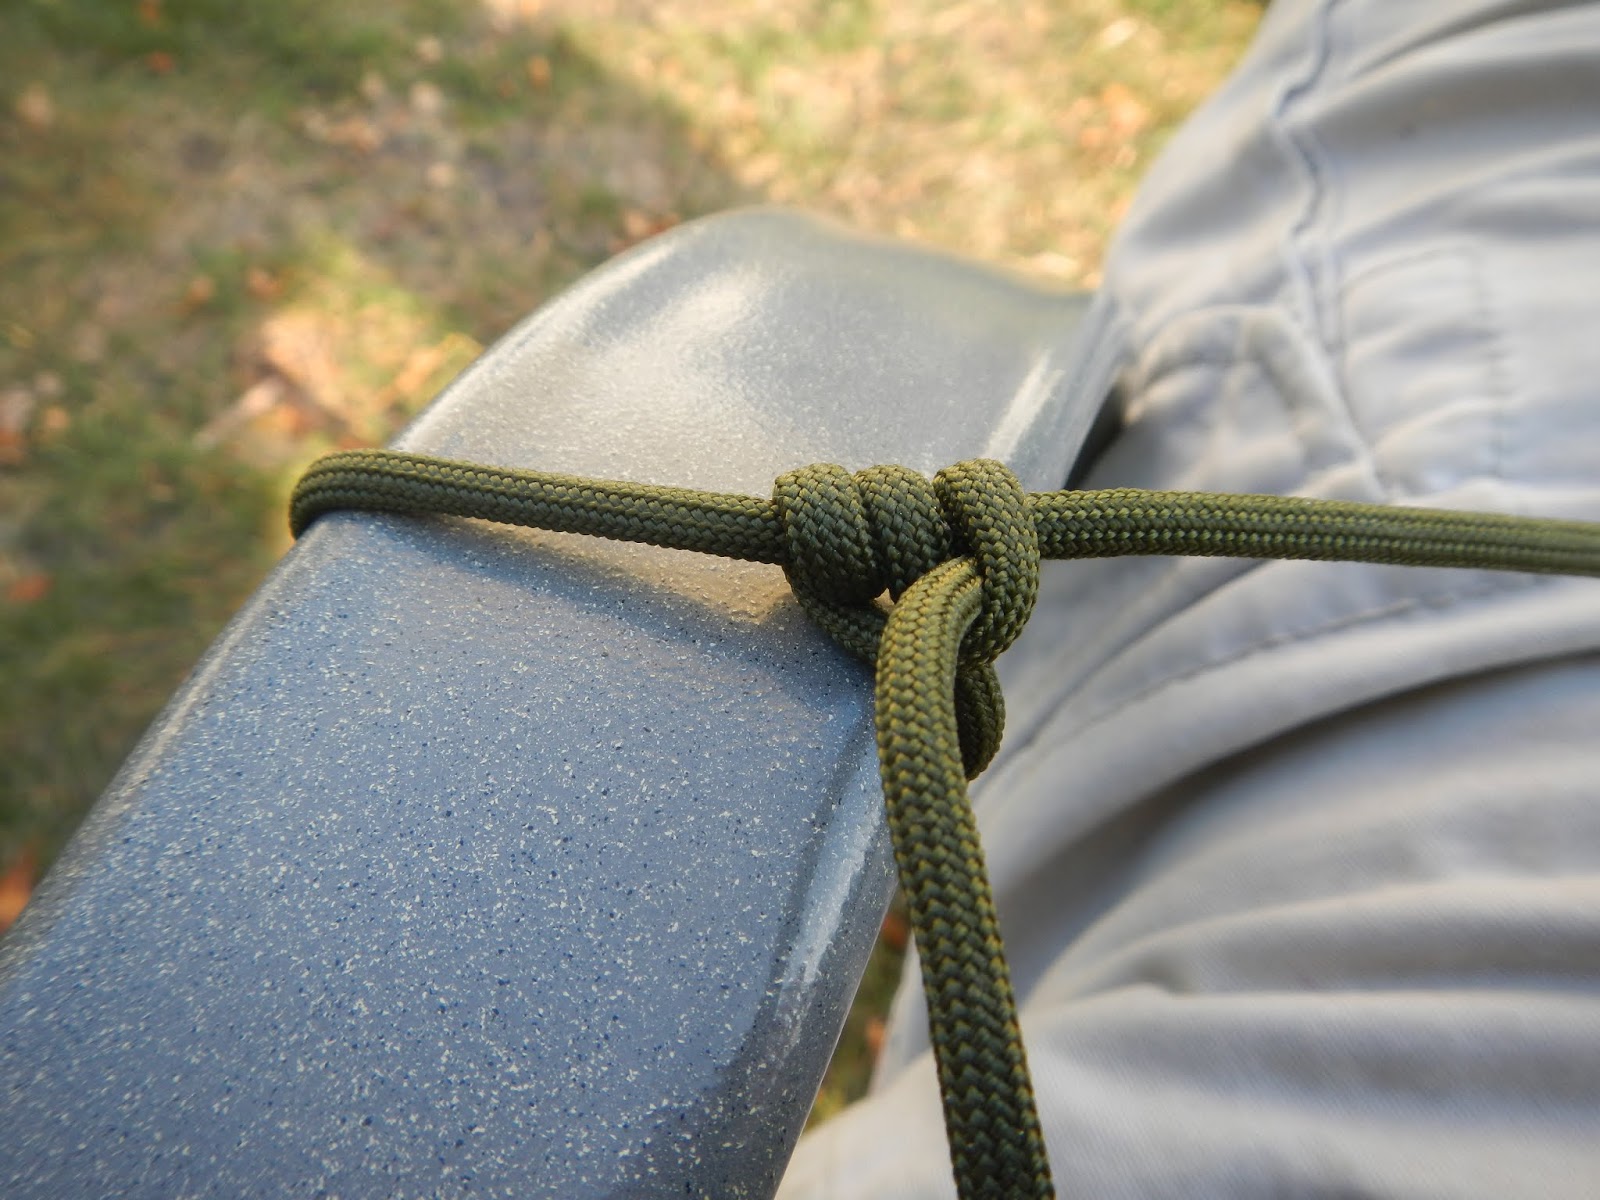
And finally, two half hitches

Ok, there is my kick off. If you're interested in the Bushcraft course, I just included a link to the first page in the forum.  

I hope you stay with me!

Comments are a great way to help motivate me along the way!


-J

Monday, May 28, 2018

Memorial Day 2018

I hope everyone had time to get out this weekend and enjoy themselves. The weather here in MN was gorgeous, but we are in the middle of a heat wave! We've had 4 days of 85-90F + here. barely 5 weeks ago we had a foot and a half of snow dumped on us!

Anyway, as I said I hope you had a great long weekend, I also hope you gave at least some thought to those men and women of our Armed Forces who gave their lives in service to our Country. Without whom we would not have this holiday.


J

Monday, March 5, 2018

Rule of 3 part 2


Back with part 2. I’ll try to keep this short and sweet.

In my first post I spoke of shelter, our first priority in a survival situation. Remember we are using the scenario of heading out on a day hike. Only expecting to be gone a few hours but something happens and you are out overnight.

Now, if you were lucky you started to hydrate before you left on your trip by drinking plenty of water. Good old H2O. Camlebak used the slogan “Hydrate or Die” and, as we know, this is true. So if we start the day before, event eh night before and just…drink water. You don’t have to force hydrate in most cases, just simply up your water intake a bit.  Like we talked about with your clothes being your first line of shelter, being hydrated before your trip is a good base line. You don’t want to set out and already be mildly dehydrated.

Now, your planning your outing you’ve picked out suitable clothes and been drinking water but your still going to need water ON your trip. Simple answer, bring a water bottle. My local thrift shop has stainless steel bottles for sale very cheap. Nalgene bottles are still readily available and work great. Some folks like to bring a Camelbak type product. Some of the packs are of a good enough size and have pockets that you could make a day pack out of them easily.

 Even just stopping off at a convenience store on your way to your hike you can get a bottle of water, a bag of trail mix, some beef jerky and, my favorite, a Snickers bar. Don’t forget to grab a bright colored bic lighter at the check out too J.

Bottom line, water is too important not to bring along on any hike.

I’ll be back with more!

--J

Saturday, March 3, 2018

Survival rule of 3

This post is kind of a basic survival 101.  Knowledge is power, especially in survival situations as well as in bushcraft. Mors Kochanski has been quoted as saying something to the tune of the more you know the less you have to carry. Great advice.  Survival is just that, a situation that you may find yourself in which your very existence is on the line. Bushcraft is similar, I think. You take to the woods and use your knowledge and skills to make your self comfortable.  There is some cross over here for sure. The skills and techniques I practice in Bushcraft could very much come in to play in a survival situation.

on to the Rules of 3

1st - you can survive 3 minutes with out air. This is a no brainer to me. We breathe air and thus we need it to live. No oxygen and we die, simple as that. When you search up survival rules of 3 this one seems to come up first always so I include it here but come on....this is basic.

1. You can survive 3 hours in an extreme or harsh environment.
2. You can survive 3 days with out water.
3. You can survive 3 weeks with out food.

There they are. 3 simple rules but if you can't meet them, you die. Another survival rule of three is similar but slightly different. These three are in order of importance.

1. Shelter
2. Water
3. Fire

Slightly different but still very similar. I roll water and food in together as #2 with more importance placed on water of course.  These are 3 basics that will let you survive a situation until rescue or you find your way back if lost.

So, what does this mean from a survival stand point. well, you can help yourself before you even set out. You can have a car kit in your trunk or way back in your car. A 5 gallon bucket with a blanket, some bottle of water and a bit of food could make all the difference in a winter emergency. Your car itself can act as shelter.

Lets look at those last 3 on an even more basic scenario. Your going on a day hike. Nothing crazy, out for a few hours and then back. Something happens and now your out over night. For this I'll assume lost and not injured as that is a whole other barrel of monkeys.

Well, we can help ourselves with shelter right away with what we choose to wear. Our clothing can be our first level of shelter. Dress for the weather of course, Bring something along for just in case. I'd recommend some good cargo type pants. Something with good pockets and belt loops. I'd aslo wear a good sturdy belt and a belt knife or mulitool of some kind. If you don't want to wear a knife, a pocket knife in your pocket is a great idea. A moisture wicking top if hiking in war weather will help control body temperature during the hike.  Carrying a light weight jacket,a rain poncho/ tarp,  or even a sweatshirt can make a huge difference if your day hike suddenly turns in to an over nighter or a weekender.

 In the Winter you may need to bring along something more substantial, heavy coat, underwear, etc... location dependent. That means what I bring for a winter emergency here in Minnesota may be different than someone in Arkansas.

Alright I'll leave this here for now and we will return in the next post and take about part 2 Water.


Hey, let me know what you think, leave a comment or a suggestion.

Thanks for coming along.

--J


Sunday, February 11, 2018

What happened to the good old Leatherman?

Rewind to the year 1991.  I was stationed in Ft. Richardson, AK.  At the time I was a young Infantryman in Bco (Mad Dogs) 1-17th IN.  Just about every one of us had a multitool on our belts daily. That tool was the Leatherman.  It's name was a brand standard like Kleenex or Fed ex. You didn't ask your buddy for his multi-tool when you needed it, you asked for his leatherman.  It had everything you could need on a regular basis: pliers, a good knife blade, a file, screwdrivers tips. It was awesome.  I remember it had a little tip that was awesome at getting the carbon off of the bolt on an M16A2.

I used mine daily whether we were in garrison or the field.  There was always a use for it.  On a deployment to the Philippines I gave mine to a counterpart. A tough as nails Phil Corporal who could drink beer with the best of us and showed me how to live in the field on the islands. I figured I'd just pick up another one when I got back to Rich at the PX, no big deal.  Long story short, I forgot.

A few months later I was stationed at Ft. Bragg, NC with the 82nd.  there were options now in the multi-tool department. Gerber had one out know that could deploy it pliers with just  quick flick of the wrist.  I decided to give that one a try.  It worked just fine, in fact I noticed over the years soldiers changed from asking for a Leatherman to asking for a Gerber... Times change. I'm not sure where mine ended up, a few years later and we were even issued them from Uncle Sam.  I still have one in my OTIS cleaning kit too.

early this year, 2018, I got to thinking that I really wanted to have a multi-tool on hand again for day to day needs.  I searched up Leatherman again as it was the original and the one I liked the best. To my surprise the original model is available again!  I can get an original PST for the low low price of $245!!!  No way in hell.

 I was really surprised that the original model was not still widely available.  Leatherman DOES have quite a number of models available in several sizes. The Wave, the Surge, the Sidekick, all have great tool features and wonderful curves and lines to them. I wanted the classic though, just as I remembered it. 

I was happy to find a model that was very close to the PST and decided it would be the one I wanted.  The Rebar.  It has 17 tools on it as opposed to the original PST's 14. It has pliers, wire cutters, crimpers, wire stripper, ruler, knife blade, serrated knife blade, a file, a saw, and several screw driver blades....

I found one on ebay for less than half the MSRP shipped only missing a sheath. I ordered it up and got in my happy hands this past Tuesday.


I'll be happily using it from now on. I'll post up a quick review of it later on this year as I've out it through it's paces.

If you are interested in Leatherman products, here is the link to their home page.

https://www.leatherman.com/


Thursday, January 11, 2018

A boy's first knife


It's an important time in a young boy's life when he gets his first pocket knife. 

My first pocket knife was a two blade jack knife. It had a brown handle with small silver shield on the handle. My Grandfather took me down to our local Target store and we picked it out.  I was 7 years old. I was SO proud. Then I screwed up and lost it.  I had it in my pocket, where it had lived from the day it was given to me. I was playing at a friends house when it fell out. My "friend" grabbed it up from the ground and ran inside his house. I ran after begging him to "Give it back!" He didn't. In fact he lied to his Mom and told her he didn't have my knife. His older sister took his side too, even though she knew he did have it.  I was beside myself crying. I walked slowly home and sat on  he front steps feeling awful.  A few minutes later the older sister came up the street on her bike. She said something about giving back my knife and she threw it. From the street. My heart leaped at the idea that I would get my most treasured item back! She didn't throw it very hard and it fell into the street before it got to me. It fell in to the street and right down a storm drain. I was crushed.

In the short time I did have that knife I had the wonderful experience of sharing time with Grandpa. We sat in his back yard and whittled away at the many maple branches that fell from the huge tree in the yard. Even now I can remember how smooth those twigs and branches felt after we stripped them of their bark. The fresh green scent that came up from the bark curls gathered around our feet.  I knew I was doing something with Grampa that"kid stuff". This was important stuff, grown up stuff. Even at that young age I could feel the seriousness of handling a pocket knife safely.

Tonight I had the privilege of working with a group of cub scouts on their Bear Claws adventure. We learned safe handling and care for pocket knives. How to cut with their knives, how to sharpen, even the correct way to hand their knife to someone else.  I don't know if they picked up on the seriousness of the lessons, I know from the smiles and nods I received their Dads and Grand Dads did.

Pictured at the beginning of this post is my son's first pocket knife, an Opinel No. 6. 
As promised, here is a better picture of the completed axe.  I really like how the BLO took to the handle and the rich color it added.  I did sand the handle first with some 220 grit sandpaper. Some of the handles bought at stores feel like there is a thin coating on them. I also wanted to make sure the handle would take the BLO.  Also I checked and the handle is a 26" model.


I do have some more file work to do on the blade edge. There are still some small nicks I want to get out of it. At this point, though, it is VERY sharp and would be just fine in the woods.

Tuesday, January 9, 2018

I hung a new axe

Welcome to 2018!

To be honest I hung this axe in the summer of 2017.  I purchased a Swedish Military Surplus Axe from Sportsman's guide back in about 2013 or so. Finally this last summer I got around to putting a new handle on it and stripping off the OD paint job.

The picture below is a WIP shot about mid way through the process.


Shown are the tools I used for the process minus a shot of a few of the clamps I used as needed.
A bastard file, a 4 in hand rasp, rubber mallet, spoke shave, a beer and my Aegishjalmer pendant made for me years a go by Lee Kinder.

The process is simple enough, but as this is only me second time I know I still have much to learn.  I picked out a handle at my local Mom and Pop hardware store, I think this is a nice 24" one. The head itself isn't very big, I think its about a pound and a half. Its not to long or too heavy; I can strap it to a pack and take to the woods easy enough.

I learned how to hang from the Bushcraft USA forums linked in my side bar. Also i supplemented my learning with You tube videos.

I'll post a follow up picture of the axe as it looks now, oiled up with multiple coats of boiled linseed oil or BLO as many folks tend to refer to it.

enough for now, I need to leave something for more posts!

Get outside!

Saturday, April 16, 2016

Garden Time!

Hey All,

Getting ready to put the garden in here at my small city lot. Nothing fancy, mainly things I know we will eat as a family, either fresh or canned.

For simplicity sake I ordered all my seed and plants from Territorial Seed Co.

Here is what's going in:

Cabbage
Cauliflower
Turnips
Parsnips
Rutabaga
Beets
Carrots
Hot Peppers (Jalapeno, Habenero, and Pepperoncini)
Tomatoes
Potatoes
Cucumbers
Various cooking herbs


Lots of root veggies I'm hoping will keep. Fixings for my own salsa and tomato sauce. I'm going to try to make my own gardiniera relish and pickles.

Anyway, that's whats going on at my homestead,


-J


Thursday, March 31, 2016

31MAR16

Hey all,

Last post I promised pics of the Apocabox I received from Creek Stewart..still can't locate the camera to take some decent pics....sorry. I don't really want to take cell phone pics as I don't feel they do the subject justice.

This next month (April) is a fun month for my Cub Scout Den. I'm leading them on their "Tigers in the Wild" adventure. One of the requirements is to put together a kit with the Boy Scout "6 Essentials" to have for going out on a hike. Suffice it to say,the Scouts and I have a different idea on what those essentials should be. I'll teach the adventure as written but I will show the boys some other ideas on things they can carry in their kits.

The weather has been getting better and better here in MN and with my work schedule finally starting to co-operate some field time can finally be planned and enjoyed.

More posts soon!

-J

Tuesday, February 16, 2016

Apocabox!

Hey all,

I'm really excited to share with you some thing new for me. I subscribed to Creek Stewart's Apocabox subscription service. More information can be found by following the Willow Haven Outdoor link in my sidebar.

Basically, every 2 months I get a box in the mail filled with survival items chosen by Creek Stewart himself. Tools, supplies, information, and lots of other great things.

As soon as I find my camera I will do a full review of the February Apocabox!

Thanks for coming along...

-J

Wednesday, December 9, 2015

This year, 2015, has been full of a lot of new changes here at "The cabin".

Started a new job in January with the Postal Service. All is going well there, I am just plugging along waiting my turn to be "made regular", which means I become a career postal employee, not a contractor.

Purchased a nice home big enough for my family to stretch out in and live life. Grounds keeping and general maintenance keep me busy at home.

Still an active den leader of the Cub scouts, boys are growing and learning but they sure aren't slowing down anytime soon!

Here's wishing you and yours a Merry Christmas and Happy Holidays!

Sunday, January 4, 2015

NCT trip planning Part 1

Hey folks,

I hope your year is off to a good start. Mine sure is, I start a new career on the 5th so I am pretty excited.

Anyway, this past week off I had time to do some of the planning for a trip I have wanted to do for a couple of years now. A hike on the North Country Scenic Trail. This entry is just going over the maps and paperwork planning and that sort of thing. My gear planning, food and clothing will be along in future posts.

 I've talked about it before but to give a quick recap it is a trail, very much like the Appalachian Trail. The NCT stretches from North Dakota to New York State, not as popular as the AT just yet but it is longer. The trail cuts through Minnesota in the Northern part of the state, passes through part of the Boundary Waters Canoe Area and skirts Lake Superior before slipping off in to Wisconsin and points East.


The terrain where it cuts through was formed during the last ice age as was much of Minnesota including our famous lakes. A large portion of the trail section I plan to hike follows an area that was created by the leading edge of glaciers that covered this part of the earth so long ago.This terrain is called moraine and what it means is the area is a mix of varied elevations,bogs and lakes, and some rolling hills. I've spent a lot of time in this part of the state since my family cabin is right there and I am familiar with the ground and excited to see more of it step by step.


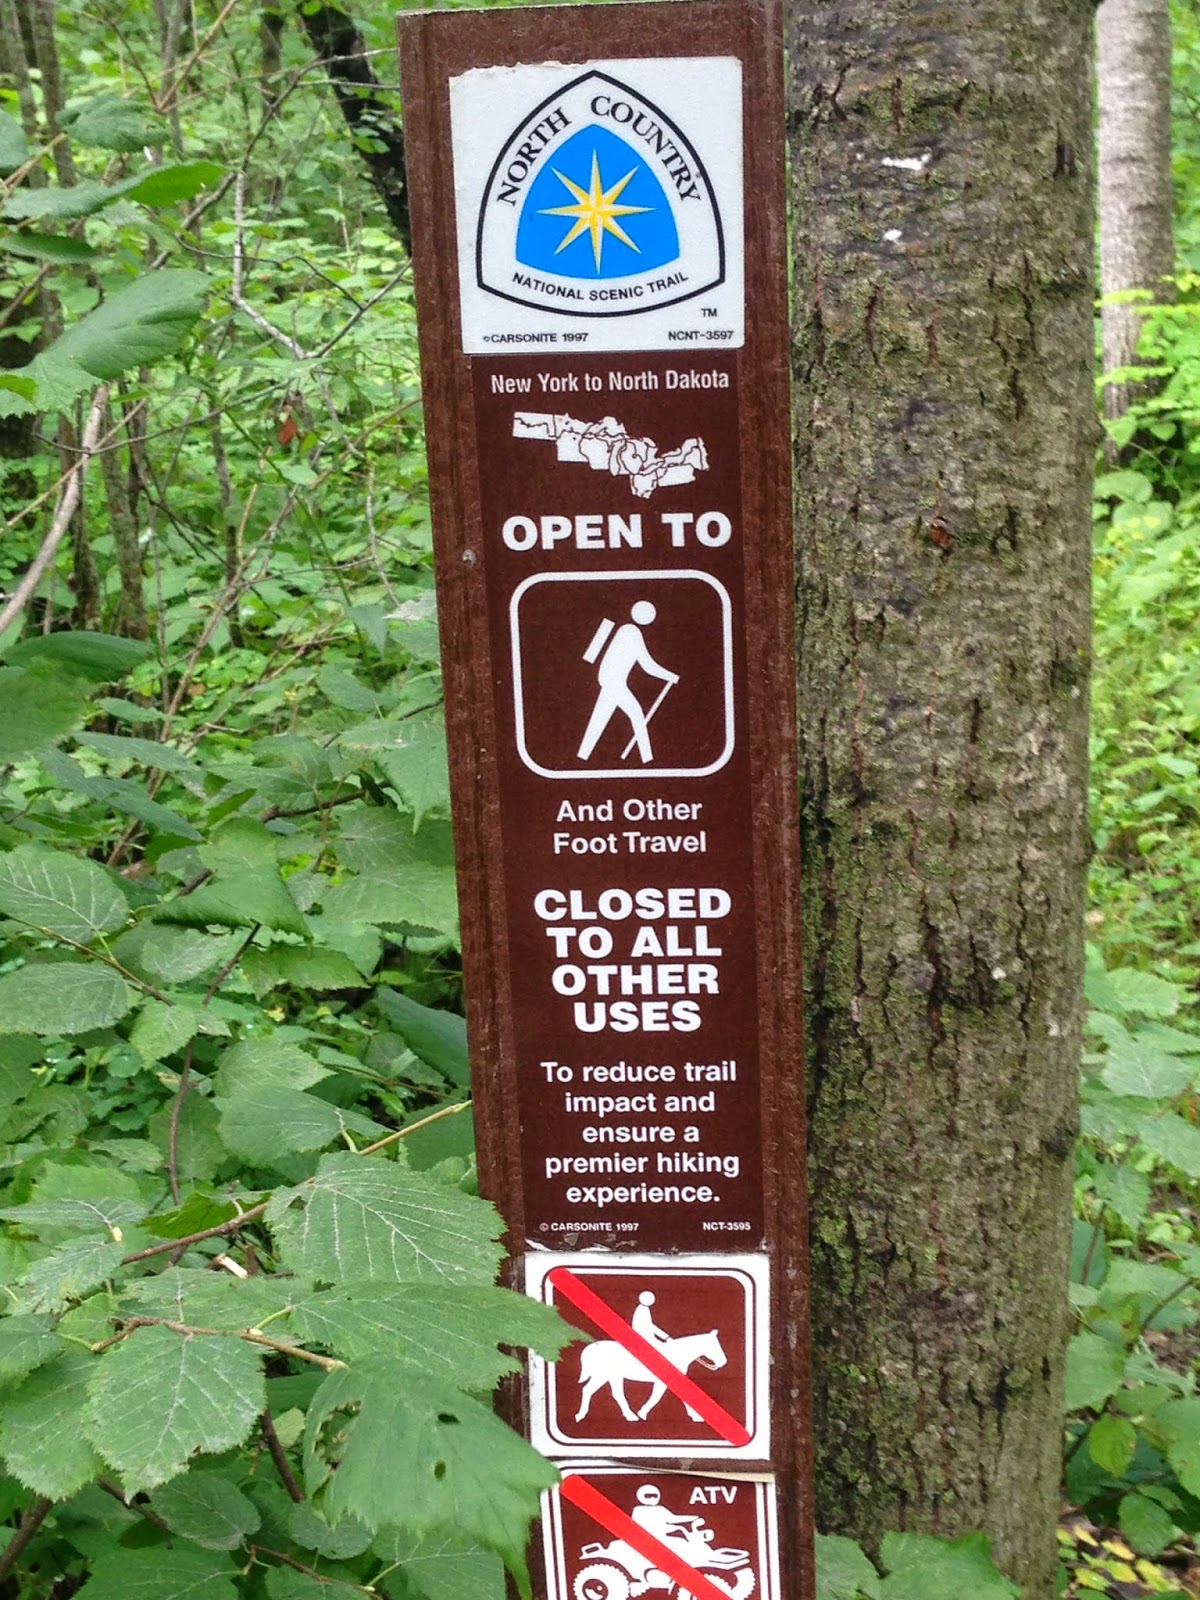
The blue blaze on the tree in the above picture is the official trail marking of the NCT. Hard to tell in the picture but in this stretch the trail is just about 8 feet wide.

I've done some research now, online through the NCT websites and forums, they even have a face book page for the Minnesota Chapters a great resource to get area specific questions answered by folks that not only hike the trail but help maintain it. I was able to purchase maps covering the areas I am interested through them as well. Give their page a look for more information at North Country Trail or visit the Minnesota chapters face book page here.

So, I sat down with the 2 maps and a great guide book "Guide to the North Country Scenic Trail in Minnesota" put out by Big Earth Publishing Company and planned a route.  The book is an excellent resource covering every aspect of the trail here in Minnesota. Mile for mile including service cities, access points and trail heads, interesting features etc...


I quickly found several easy day hikes available to me in the area I want to hike, close to my cabin and family if needed. I decided to  plan a grand adventure of a week long trip. I expect to spend 5 days (4 nights) on the trail covering about 45 miles of it in total. This would basically just press several of those day hikes into one long one. I know some experienced hikers can do 45 miles standing on their heads but this is a first for me. The last time I put on any serious cross country foot miles I was in my early 20's and a young Infantryman. All along my planned route are what I call "bail out points". Trail heads, parking lots, small towns, highway crossing and such. Places I know I can get to that have good cell service so I can make a call if needed and get help. I'm not planning to fail but I think knowing where my outs are if I need them is important.

Route selection.  It seems to make sense to start and stop at some kind of landmark that is hard to miss. The start point was an easy choice, the South Parking lot of Itasca State Park. The trail cuts right through the park and this lot. Itasca State Park is also the Headwaters of the Mississippi river and sees thousands of visitors each year. The end point will be at a camping area in The Chippewa National Forest right off Highway 34 between Akeley and Walker Minnesota, again, lots of traffic and visitors.

As an aside a hike of the trail across Itasca would be a great day hike and maybe even a good meetup for folks from the Bush Craft USA forums

Day One: South parking lot of Itasca State park East to the Amikwik campsite, about 12.9 miles. It's the first day so I will be fresh, this is the longest leg of the hike. The campsite should have 3 tent sites a fire ring and a privy and over looks a beaver pond. I will be filtering and boiling any water I collect on the way. Amikwik is Ojibwe for Beaver

Day Two: Amikwik campsite to the Nelson lake/Gulch Lake campsite, about 7.9 miles. Gulch Lake is a state run campsite, I will need to pay to camp here. 3 campsites, and other facilities available.

Day Three: Nelson/Gulch lake to Waboose Lake campsites, this section heads almost straight south. 9.7 miles Another established campsite with tent pads, fire rings, etc... Second longest leg of the trip. Waboose means rabbit in Ojibwe.

Day Four: Waboose lake  back Eastward to Sprinkle Lake Road campsite about 7.3 miles. 4 tent pads, fire ring and privy. The campsite is on a spur 60 feet off the trail.

Day Five, last leg: Sprinkle Lake Road campsite 6 miles to the Shingobee recreation area of the Chippewa National Forest, my pick up point. After pick up a celebratory meal in Walker then 45 minutes back towards Park Rapids and th cabin for a weekend of recovery at our lake.

As I said none of these legs are very long or challenging, this is a relaxing trip. I left lots of time and hopefully energy to be able to stop and explore along the way.

Thanks for following along so far!


Saturday, January 3, 2015

Happy New Year!

As I was Up North visiting my parents during the New Year holiday I took the opportunity to get out on new years day for a quick day hike. Original plan was to go solo but my oldest daughter, and then my Step Father and Comet (his labradoodle) tagged along as well.

They live out by the airport in Bemidji, MN. cross their street is a big patch of stat land and some potlatch owned land as well. In short a nice little woods to walk through.

The temp for our hike was in the 20's and over cast. A slight wind but all together not too bad at all. I grabbed some survival kit stuff for my pockets, my water bottle and my Turley Green River knife and off we went.


Ok, in the above pic is the kit that I brought with. there are some gaps, calculated risk given that I was within 1/4 mile from home and everyone at home knew exactly were we were going. Cell service was excellent as well.

Top left is my orange REI Nalgene. orange so I can see it out in the woods when I set it down. Next is a little altoids kit: Wolf Creek Forge knife, exotac nanotstriker, boullion cube, 3 PJC's, some bandaids, a bic lighter and about 12 square inches of tin foil. A zebra mechanical pencil I just happened to have in my pocket. Finally a piece of an old army VS-17 signal panel about 18" wide by 3' long. As you can see it's blaze orange on one side, the reverse is hot pink. Very visible especially in winter conditions when the world turns pretty drab.

Upper middle is an emergency blanket and a UCO stormsafe match box with lifeboat matches inside. Next to that is a signal mirror I have been carrying since my days in the Infantry in Alaska. Below that is a piece of wetfire tinder, my SAK farmer with a ferro rod attached and, of course, the Turely.

In hindsight I should have grabbed the 25' coil of 550 cord I brought up too since I had room for it. I also need to get a nesting SS cup for that nalgene, that has been a need of mine for a while and I will be addressing it very soon with an REI gift card I got as a Christmas present.

Ok, gear all set and off we went!


Water Bottle fit perfectly in my Bushcrafters dump pouch by Badger Claw Leather works, thanks again John! You can also see how bright that panel is sticking out above my pocket.

We set out down the trail, with the 2 dogs with us finding any other animal tracks was tough but we managed a few.


 The dogs quickly found some predators left overs,just hidden under a thin blanket of snow.


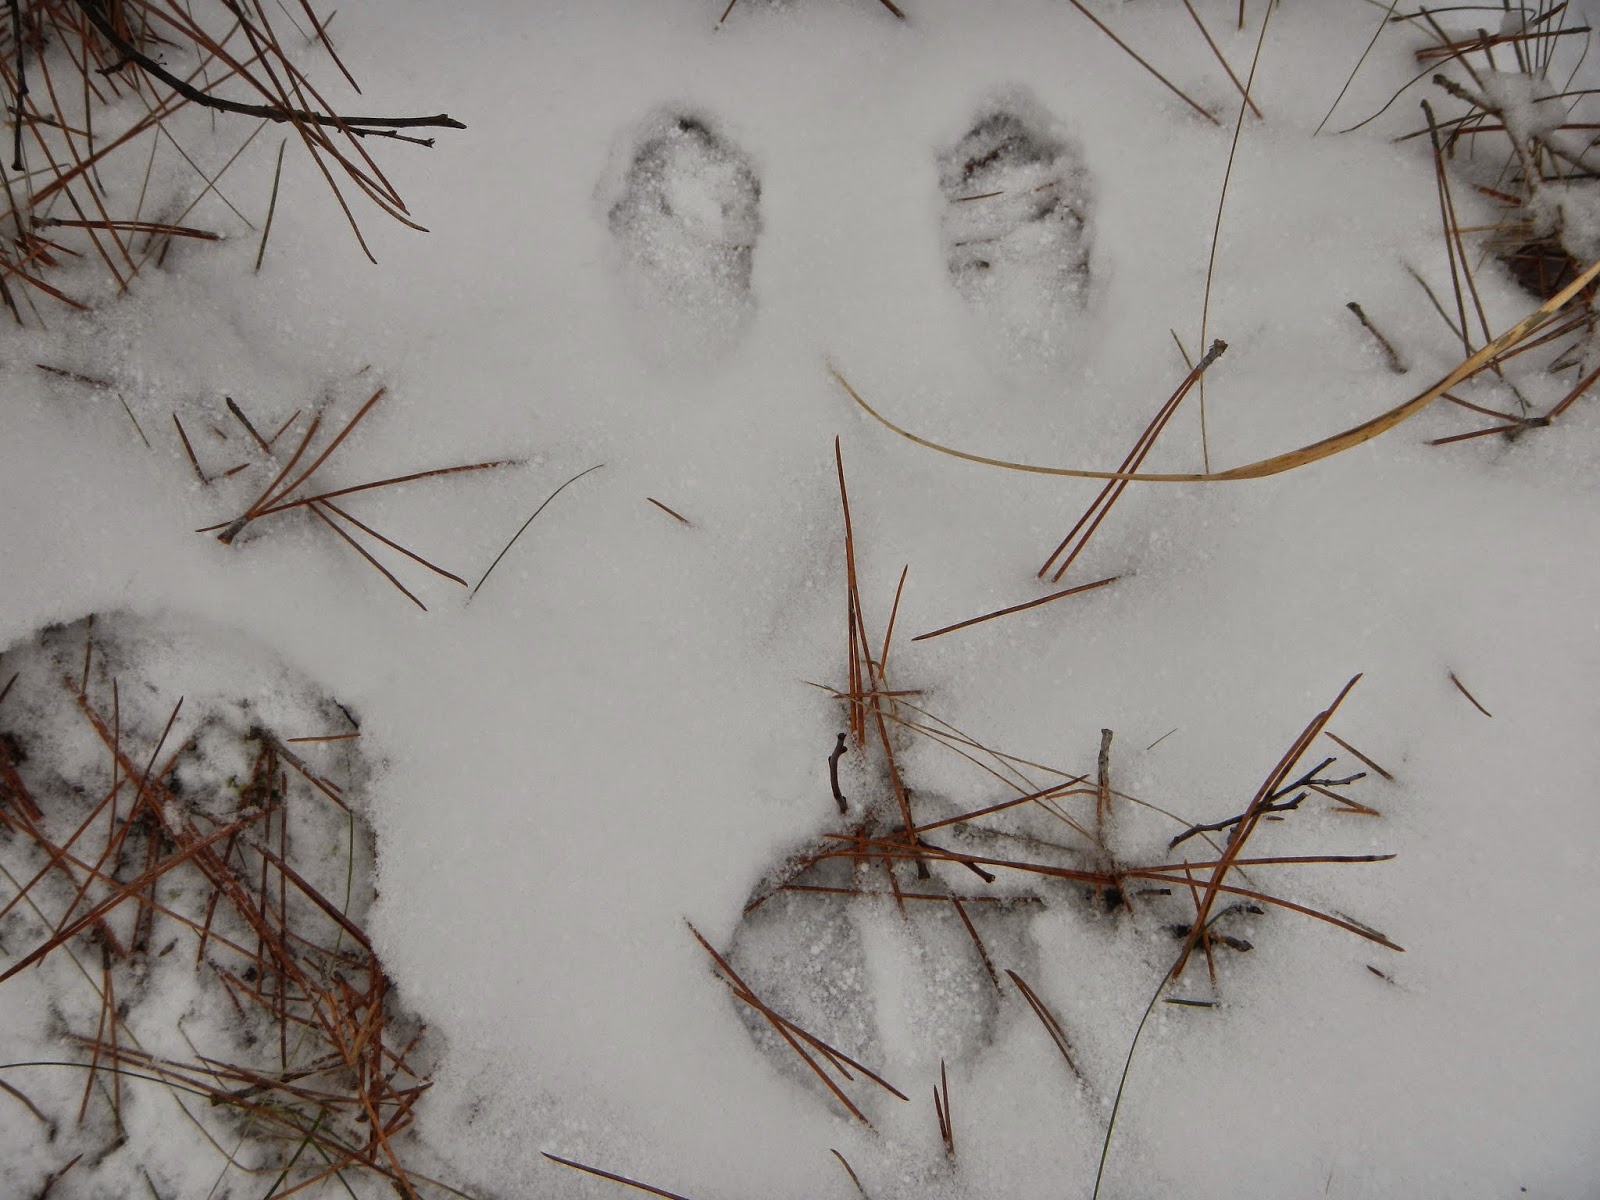
 Hard to see in the following pictures but we found, rabbit, partridge and mouse tracks.


Comet, our companion, runs about 90 lbs. He's what I would call a pretty good sized dog. Here is a shot of him and one of his print next to my hand for a size reference. If I come across another variety of canine track in the woods be it wild or domestic, at least I can gauge it's size a bit better. We do have coyote and wolves in this area and the area of our cabin which is about an hour south near Park Rapids.


 I didn't set out to practice any skills, just get out in the clean cold air and enjoy a little hike. In that respect I was a success. The fact that my video game centered oldest daughter volunteered to come along and spend time out with Dad (and Grampa and the dogs) means it was an unparalleled success. I'm always happy to spend time out in nature and when I can share that with my loved ones I cherish the time even more.

I hope everyone can get out this year and enjoy the wilderness and nature, even if its just a small hike with your loved ones.


Monday, December 15, 2014

My latest piece of kit!

 Hey all, back again with another post on a new piece of kit. This is also my first post that will also appear on the Bush Craft USA blogs. So if you found my blog there and then made your way here, welcome! I’m always looking for new readers
I just got this little gem off an auction on ebay and I’m really happy with it. It is a tired and true old school repair kit. Lots of information on it on the web, you tube videos on its use, the whole deal.  It’s not my intent to reinvent the wheel and go in to detail on the use and operation of this item.
So, here it is a Stewart MFG Speedy Stitcher stitching awl. As a size reference, that is a Swiss Army Knife Farmer propping up the box in the bottom of the picture.

This one is an old one but is in perfect working condition! Check out the shipping date and postage cost on the box from when it was originally sent to the first owner. November 30th 1967 from Sportsman’s Post Inc. in Danbury CT to Chelmsford MA for the grand total of 10¢!


It comes to me complete with a bobbin of the course waxed thread and 3 needles: a #8 needle, a #8 curved needle and a #4 fine needle. The eye of the #4 is too small for the included thread so something finer would be needed to use that particular needle.

I am an admitted history lover and I found the included original instruction sheet and spare parts order form just as cool as the stitcher itself. My kids laughed because I spent more time looking at it than the tool.  Check out that original retail price, postage paid!

Sorry for any blurry pics and thank you for reading along!

Saturday, December 13, 2014

Hi folks!


I hope your holiday season is going well. We are in the middle of travel plans and Christmas shopping around here. Today was 50+ degrees here in Minnesota and we've now lost almost all of the snow we got in November. Here's hoping we still have a white Christmas.


I've been busy lately and happily so. I was asked to be the Den Leader of my son's Cub Scout Lion cub den right after we joined up. Wrangling 5 year old boys is tough but I love every minute!


I've got a gear review in the works for a new to me antique piece of kit. Also look for another entry from the Chow Hall in the near future looking at meal planning for a 3 day trip.


Anyone else like to drink hot tea on cold winter days? One of my favorites isn't expensive and I find it everywhere but I LOVE the taste:


I've never been a coffee drinker,I have to add so much cream and sugar to get it down I might as well just be drinking hot cocoa. I also don't have one of those subtle nuanced palates, I like bold strong flavors and this tea delivers!

I highly recommend it, give it a try with a little bit of honey and it will knock the chill right off you.


Monday, November 10, 2014

What to do this winter

Well winter has come a little early here in the Land of 10,000 lakes. Today brought our first snow fall of the season. A sticky, heavy, wet 6-8 inches or so.


To go along with my last post regarding Experience vs. Knowledge  may I offer a suggestion? How about taking some classes in bush craft skills online?  What if I told you they were completely free? sound too good to be true? Think again, my friends.


One of the best forums out there that pertains to bush crafting is Bushcraft USA, the link can be found on the sideboard of my blog. There are so many great threads on that board it's unbelievable. Trip reports, gear threads, vendors, and much more. One of the best features is Bush Class.


Bush Class USA


Bush class is an online course offering various classes on skills and techniques ranging from the basics through intermediate and advanced skills. They are taught mainly by Terry Barney of the Midwest School of Bushcraft. Terry is also a former Air Force Survival Instructor.  While Terry is the main man, many of the courses are taught by other amazing members of the forum.


These classes are done on your own time with no pressure. To earn your certification in each of the three levels you submit pictures or video of your completed class in the appropriate threads. In addition each to the skills each course requires a number of outings, many of which are "overnighters". They don't have to be done in order but one class does build on another so it is easier and makes more sense to do so.


Personally I wont be winter camping this year so my over nighters will wait until the spring thaw, but I will try to get out for some outings to hone skills during some of the milder days ahead.  The classes themselves, aside from those requiring fire craft can be done in the comfort of your own home, mostly.


A great way to gain some valuable experience with some skills to have if ever you should need them.